Showing posts with label Grubby Knees. Show all posts

Sunday, 10 May 2015

Leek Planting and Water Butt Dipping

 Such a glorious day for shrimping and planting!


A chance discovery of Pond Shrimps, in the communal water supply at the allotment, provided an afternoon of enthusiastic water butt dipping for the girls. As we have refused to purchase fish for the pond they have been creating the shrimps provided them with alternative pond occupants.


Hopefully the rather bumpy ride, from butt to pond, in a wheelbarrow won't have been too traumatic for the troupe of shrimp and they will thrive in their new habitat.
It would be an awful shame if the "lobsters" that we have acquired, were to die of shock before they were big enough to eat!


While the girls busied themselves with their pond project Marcus and I planted out the leeks. We employed the same technique that we used last weekend for the shallots.
The seedlings are so tightly packed together (like a clump of grass) that they need to be completely saturated with water to separate the dense network of fragile roots. 

First we popped the seed pot into a shallow tub and filled it with water. After allowing it to soak for few minutes we gently agitated the water around the roots so that the compost came away without snapping them.
Next we used a dibber (pointy tree stake) to make holes about 5 inches apart and 3 inches deep and popped a leek seedling into each. 
Each hole was then filled with water; this makes the hole fill itself in and wraps the leek in lovely wet soil. 
Hey presto, the leeks are planted! 

It's great to see our crops beginning to take hold. The beetroot, parsnips, broad beans and chard are all looking good as are the onions and garlic. The shallots still look like straggly blades of lying, limp on the mud but Marcus assures me that they will stand up soon. 
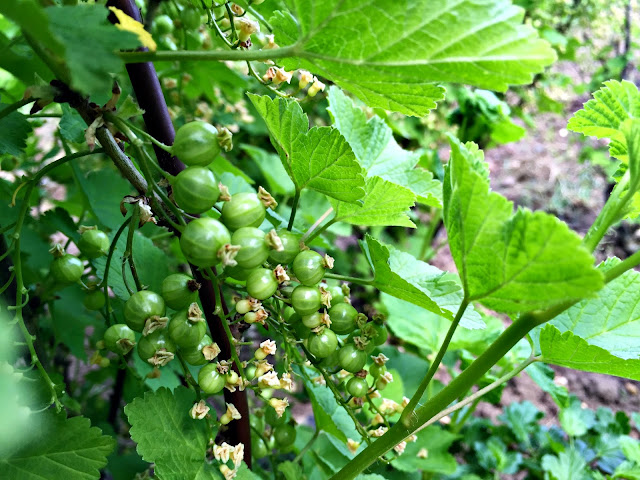
We have masses of red and white currants and gooseberries so definitely need to get them netted before the blackbirds spot them!  


Saturday, 2 May 2015

Foraging in our Garden

As we carefully nurture our seedlings and tend our allotment; guarding against late frosts, regularly potting on, watering and weeding, it always amuses me how bountifully our weeds grow! Left to fend for themselves they are already lush, green and prolific. A few weeks ago I was rejoicing in the availability of nettles, well now it is the turn of Ground Elder.


On the whole, this is considered a pervasive and troublesome garden weed that aggressively out competes most other plants. It is pretty tricky to get rid of once it has established itself and will spread either by seed or by its rhizomes (long, horizontal underground stems). These can spread by as much as a metre a year and are rather brittle. If broken they will easily regrow and generate an even wider spread of ground cover. As it is so tricky to get rid of I reckon that the best solution is to embrace its abundance and eat it!


Flavour wise ground elder is rather tasty and nutritious ( a good source of iron, manganese and vitamin C). Like so much 'wild' vegetation, it works well when used as a spinach substitute, the youngest leaves are also good eaten raw in salad. It has a slight tang and a more aromatic flavour than spinach. Our Monday evening meal this week was 'pie'. We had a fair amount of leftover chicken and plenty of gravy from our roast as well as a couple of pork burgers left from a barbecue on Saturday. With just a couple of leeks and a few handfuls of ground elder these ingredients became a mighty fine pie.


Rough puff pastry is a big favourite with the girls so I tend to opt for this as my pastry of choice for pies. I can usually smuggle all manner of ingredients under the pie lid without too many complaints!


Having lined the pie dish with pastry I use the scraps to make an extra rim around the edge of the dish. This helps to raise the pie lid and gives the pastry more of a puff.


Chicken and Ground Elder pie 

(Clean Plates 4/5 - two of the tasters were hesitant about 

the ground elder but only when I brought attention to it!)

Filling
Leftover Cooked Chicken (we usually have a leg and some breast)
2 pork burgers/any uneaten stuffing (a sausage meat one would be ideal)
2 Leeks
25g Butter
1 Tbsp Fresh Tarragon
Nutmeg
400ml – 500ml Gravy (or chicken stock)
1 Tbsp Flour (only if using stock rather than gravy)
150ml White wine
50ml Double Cream
Salt and Pepper
2 Handfuls of Ground Elder

Rough puff pastry
300g Plain Flour
150g Cold Butter
150ml – 180ml Cold water

Chop the butter into cubes around 6 mm squared.
Add the cubed butter to the bowl of flour and toss until all the pieces are coated with flour.
Gradually add the water to bring the mixture together into a firm dough.
Tip onto a well floured work surface, shape into a rectangle and roll in one direction until you have a rectangle about 2 cm thick.
Fold the far third towards you and the nearest third over that to create three layers.
Give the pastry a quarter turn and then repeat the rolling, folding and turning process 5 more times.
Wrap the pastry in cling film and chill in the fridge for at least half an hour.

Finely chop the leeks and tarragon and then melt the butter in a saucepan. Keeping the heat low, gently sweat the leeks until soft.
Strip the meat from the chicken carcass and break the stuffing into bite size pieces. Add to the pan with the leeks and a grating of nutmeg.
If you are using stock rather than leftover gravy add a tablespoon of flour to the leeks and meat and cook for 2 minutes.
Pour in the wine and gravy or stock and allow to simmer for 15 – 20 minutes.
Add the cream, boil for another couple of minutes then taste and adjust the seasoning with salt and pepper and maybe a bit more nutmeg.
Remove from the heat and roughly chop the spinach or seasonal greens. Stir them into the pie mix and set aside while you roll out the pastry.
Pre-heat the oven to 200C. Divide and roll out the pastry in 2/3 and 1/3 sized pieces to line and top a pie dish. Fill the lined dish with the filling, top with pastry and crimp the edges all round. Brush with beaten egg, make three knife slashes in the pastry top to allow the steam to escape.
Bake for 35 – 40 minutes until golden brown on top.


Sunday, 26 April 2015

A Week of Grubby Knees

It has been a glorious week of sun, see....dlings and pollinating!


On Monday afternoon we received the call to say that our neighbours' pear tree's were in blossom.
This is a call that we await every year and immediate action is called for. Marcus rounded up the troops and took the girls over the road so that they could gather the necessary blossom samples. As is probably apparent from the photograph, we have one small espalier pear tree in our garden. This was given to us five years ago when our friends moved to France. For the first three years it flowered but didn't produce a single fruit. Ideally pear trees should be planted in pairs!
Two years ago Marcus had the bright idea that we should attempt to pollinate the flowers manually. We asked around to find out if there were any pear trees local to us and found a match. The first year produced 6, the second 12 and, if we are going to follow a pattern here, this year, we are hoping for 18 fabulous comice pears!
The girls wafted their blossom samples under the flowers on our tree; flitting backwards and forwards like bees or butterflies (buzzing was optional!) and now we wait.


With all the warmth and sunshine that we have been enjoying our Garden Room (just a posh name for the Lean To) is beginning to look like a tropical rain forest. We desperately  need to pot things up or get them into the ground at the allotment.


Our tomato sowing in early March resulted in just the one cherry tomato plant (we are still waiting for the rest to pop up in the lawn!) and about a hundred beef steak tomato plants. We have already potted up and given away some of these. Yet, still we have a seed tray, a good three quarters full, with a dense forest of tomato seedlings that we need to find homes for.


A family trip to the allotment this weekend offered up the opportunity to test  the new drain pipe and water butt system on our shed. It works (at least it does if you carry a watering can of water from the water trough and pour it into the drain pipe!). Unfortunately a design flaw, that was not spotted in the original plans, meant that the water butt could not be raised off the ground to enable tap access in the usual manner. Instead, we have had to dig down and now have a 2 ft deep hole, directly in front of the tap! It works though!


Monday, 30 March 2015

Worms! and Giant Beetroot

With April just a matter of hours away we discovered that there was rather a lot to be done on the allotment. Much as we try to keep on top of everything; work and a constant stream of social commitments (the latter more for the girls than ourselves!) invariably tends to get in the way. Before we know it seed packets are claiming that they should have been sown yesterday and our ground preparation is far from complete.  


With heavy rain predicted for the whole day, the weather forecast was far from ideal for a day at the allotment but needs must. It actually turned out just to be heavy showers and with 'the smallest shed on the allotment' to shelter in we managed to make pretty good headway with our digging, weeding and sowing. Some of us got plenty of rest as well!


We have finally relocated our old wormery to the allotment and are hoping that we can kick start it again, without the cost of purchasing speciality worms. Apparently Tiger worms are the best species for the job but they are fairly costly (£20 for 1/2 a kilo from worms direct). Unfortunately our history of worm survival is rather poor. Over the last couple of years we have invested three times in this particular species of worms and only succeeded in killing them.
We are convinced that this is partly owing to the poor design of the wormery. The worms are able to wriggle through the holes in the bottom and then drown in the sump of liquid worm juice/fertiliser that is stored underneath.


Our alternative to this rather costly (and cruel) method is to collect our own. The girls have become our designated worm collectors. The bigger and juicier the better and with a bit of luck they will be too fat to wriggle to their deaths. 


At best our wonderful peelings will become fabulous worm juice (rather than soup!) and help us to grow enviable vegetables. At worst, the peelings will just compost away in a bin and we won't have killed half a kilo of worms and wasted another £20.

On the subject of enviable vegetables, it turns out that, what I had thought last year, was chard, and merrily cropped the leaves accordingly, was in actual fact a beetroot. A beetroot of enormous dimensions!


The girls enlisted their knowledge of 'The Enormous Turnip' story and pulled and pulled and pulled! Until...........


Just like the story, we roasted it to eat with our dinner and whilst it was definitely rather woody in places, that one enormous beetroot was big enough to share between 8 of us. A far cry from our dismal attempt at cauliflower growing!!


Tuesday, 17 March 2015

Foraging for Purest Green (Nettles)

Percy: "Oh, Edmund! Can it be true? That I hold here, in my mortal hands, a nugget of purest green!"
Edmund: "Yes, well, it's more of a splat, isn't it?"
Blackadder Series 2


In my quest for 'green' and our eagerness to enjoy our first bowl of nettle soup of the Spring, we were actually rather premature in our foraging. Over the last few days I have spotted a promising number of young nettles on the edges of pathways  but when we arrived at the Orchard on Mothering Sunday (armed with gloves and carrier bags) they were in surprisingly short array.


The girls were as keen as I to be tucking into nettle soup on 'soup night', so I set them the task of scouring the ground for signs of green. Positive sightings led to a bit of a 'whoop' and me running in from the side in my yellow marigolds (necessary nettling attire) armed with a carrier bag to fill. 


It was fun, and despite my initial misgivings, we did manage to collect a fair amount. Although, as the nettles were very young and the tip so close to the root, they tended to come up 'root and all' so there was a fair amoubt of sorting needed. After washing and sorting we have ended up with around 300g. Just enough for soup but another foraging trip will be required if we are to make the nettle gnocchi and nettle bread that we also have planned for our 'green week'


And so to the soup! Once the nettles were washed and sorted they were kept to the side until the last minute (adding them too early can render your, 'green', a more murky brown). The carrot, onion, garlic, potato and celery were left to sweat in (an un-healthy amount of) butter and then simmered in stock until soft. 


The soup base was blended until smooth before piling in the nettles.
NB.Either use tongs or pop your 'marigolds' back on! This may sound obvious but in the midst of all this culinary excitement, it is actually quite east to forget that, stinging nettles, sting


Turn off the heat and blend again, until the wonderful, buttery, yellow soup base, becomes, 'green'! A generous grating of nutmeg and perhaps, some salt and pepper and you are done.


Stinging nettles are incredibly high in vitamins C, D, iron, potassium, manganese, and calcium. They are also unusually high in protein for a green plant. As we were eating this as our main meal of the day (and I hadn't snuck any lentils or pulses in anywhere!) I topped it off with a poached egg for an extra protein boost.


Nettle Soup (clean plates 5/5)

250g Prepared Nettles (tops or young leaves)
55g Butter
2 Onions
1 Carrot
2 Celery Sticks
1 Garlic clove
1 Medium Potato
1.5 Litres Chicken/Vegetable Stock
Nutmeg

Finely chop the onions, garlic and celery. Grate the carrot and potato. 
Gently melt the butter in a large saucepan, tip in the vegetables and gently sweat for around ten minutes.
Add the stock and bring to the boil. Reduce the heat and allow to simmer until the vegetables are completely soft (about 20 minutes). Blend the soup base until smooth.
Pile in the nettles, simmer for another 2 minutes, until the nettles are tender and then blend the soup until smooth.
Season with salt, pepper and nutmeg and enjoy! 
To make it more of a meal, serve with a poached egg floating on top.


Tuesday, 10 March 2015

A New Shed and a Cauliflower

Our wigwam, lovingly created from old curtains and tablecloths in 2013 has finally rotted into a dowdy pile of moulding rags. Marcus spent Saturday constructing a replacement shed that he had bought through Gum Tree and we now are the proud owners of, "the smallest shed on the allotment". It is seriously teeny and looks amusingly like a regimental sentry post. Next job for the girls should probably be a scarecrow kitted out in a busby and a queens guard costume to keep Shirly company.

 The Wigwam 2013

The creation of Shirly


Talking of 'teeny', we have harvested our first and probably last cauliflower. We opted for a variety called Snow Ball, I actually think that Ping Pong Ball would be a better name for it. If we were in the business of micro veg we would be on to a winner but as a meal for a family of 5 it is seriously inadequate! 

Market Cauli on left, Home-grown Cauli on right

Apparently our cauliflower failings our not unusual and our fellow allotmentears have had similar problems. Cauliflowers generally thrive best in damp, compact soil and as we are blessed with dry, loam soil we are probably better off concentrating on other crops and feeding our Cauli habit from the market.

Sunday, 1 March 2015

The sowing starts with....

Tomatoes!

As the March winds whipped up around us we made a start on this years sowing.
First up are tomatoes. These need to be started off inside rather than sown directly into the ground


Grubby Knees Tip
If you plan to start your tomato seedlings off in the house, rather than a greenhouse, use containers without holes in the bottom instead of traditional seed trays. This will prevent muddy water dribbling over your window ledge, and will also mean that the seedlings will require less watering. It is also a great way of recycling your old vegetable containers, large milk cartons (just cut the top half off to the required depth)etc. 

This year we are trialing two new varieties; a large Beefsteake tomato, Tomato Cuore Di Bue and a Cherry tomato, Santa Small Cherry Plum.


The first packet of seeds (the Beefsteak) contained a huge number of seeds, requiring liberal sprinkling over the surface of the compost.


The second seed packet contained just two, teeny, tiny little seeds. Time will tell whether the packet was opened upside down (a jungle of tomato plants popping up in the lawn) or whether we have two premium tomato plants (they were sold to us as F1 seeds)


We have wrapped the seed trays in clingfilm, so that they feel like they are in a greenhouse, labelled them, in case we forget what we have planted and now we wait!

Saturday, 21 February 2015

Strawberry Fields Forever


It's been a while since we have done any work on the allotment but as we start to creep towards Spring we need to crack on and start preparing for earth for planting.


While the girls tackled last years squash patch (making it their own with yet another scarecrow!), Marcus and I set to work increasing the size of our strawberry patch.